If you have ever used XAMPP on Windows, then you probably have experience and knowledge about it, but with Ubuntu it’s different. It can be challenging for new users, but don’t worry, we will guide you step-by-step and help you successfully install XAMPP on Ubuntu 22.04/24.04, and create symbolic links (shortcuts) to easily start and use it.
Step 1: Update system
First, before starting to install XAMPP, make sure you have your Ubuntu system up to date. You can do this using the commands below in terminal:
sudo apt update; sudo apt upgrade
Step 2: Download XAMPP
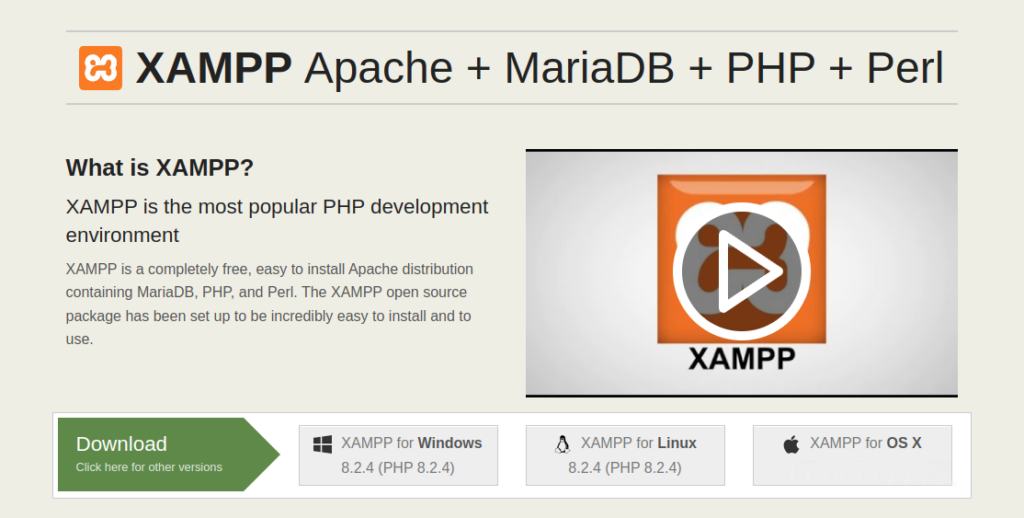
Next, click to download the latest XAMPP from the official Apache Friends website, select the version of XAMPP suitable for your Ubuntu operating system, and download the installation file.
Step 3: Install Xampp
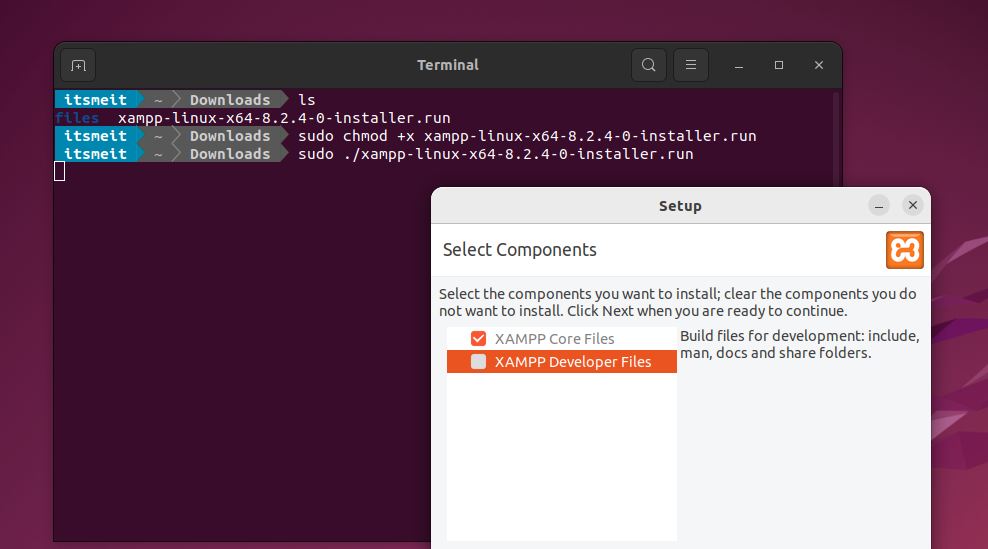
The files previously downloaded often reside in the “~/Downloads” directory, now you will need to grant executable permission to the file and install XAMPP using the following command:
cd ~/Downloads
chmod +x xampp-linux-x64-xx-installer.run
Where “xx” is your downloaded version. In this tutorial, we downloaded the version “xampp-linux-x64-8.2.4-0-installer.run”. So after granting execute permission, I will run the following command to install XAMPP on my Ubuntu 22.04:
sudo ./xampp-linux-x64-8.2.4-0-installer.run
The installation process will proceed, simply click “Forward” to accept the default location at “/opt/lampp” and continue clicking “Next” until reaching “Finish”. (similar to the screenshot)
Step 4: Start Xampp using terminal
After completing the install Xampp you can start Xampp with the command below and switch to the manager server tab to start Apache and MYSQL Database.
sudo /opt/lampp/./manager-linux-x64.run
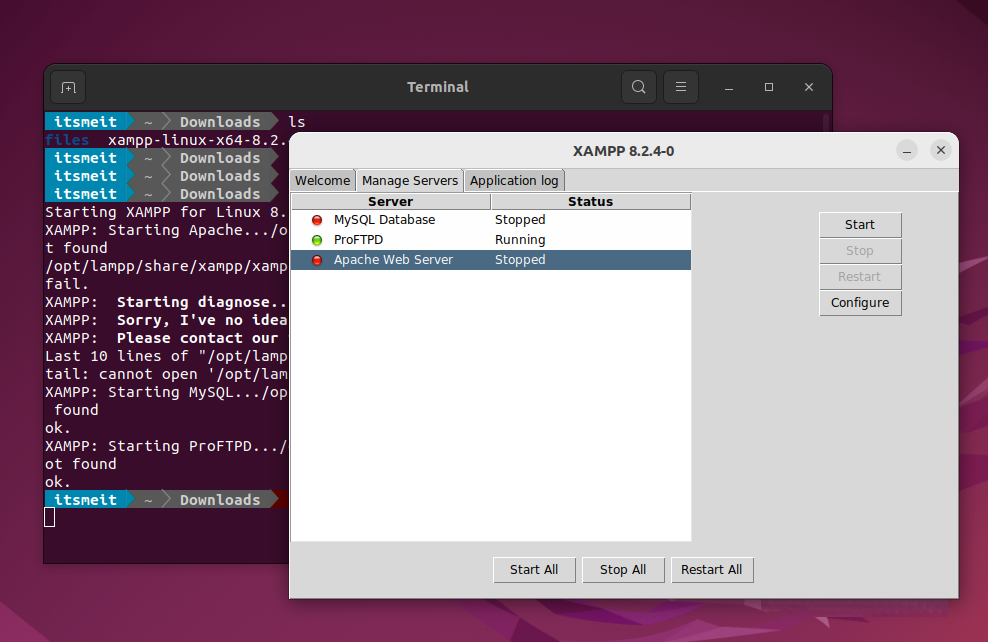
XAMPP will start running and you can access your web browser by typing “http://localhost” in the address bar. You will see the XAMPP management interface where you can manage web services like Apache, MySQL, FileZilla.
Step 4: Create Xampp shortcut on desktop
On Ubuntu, every time you want to start XAMPP, you will need to open a terminal and run a command, which may seem a bit inconvenient. To simplify this process, you can create a XAMPP shortcut icon, similar to Windows. To achieve this, open a terminal and execute the following command to create the file “‘xampp.desktop”:
sudo nano /usr/share/applications/xampp.desktop
Then copy this code and paste it into the xampp.desktop file, press the “Ctrl + X” key combination and select “Y” to save the file.
[Desktop Entry]
Version=1.0
Type=Application
Name=XAMPP
Exec=sudo /opt/lampp/manager-linux-x64.run
Icon=/opt/lampp/htdocs/favicon.ico
Terminal=false
StartupNotify=false

[Desktop Action Manager]
Name=XAMPP
Exec=sudo /opt/lampp/manager-linux-x64.run
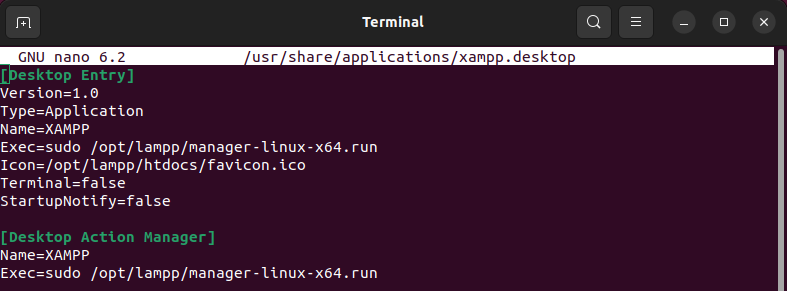
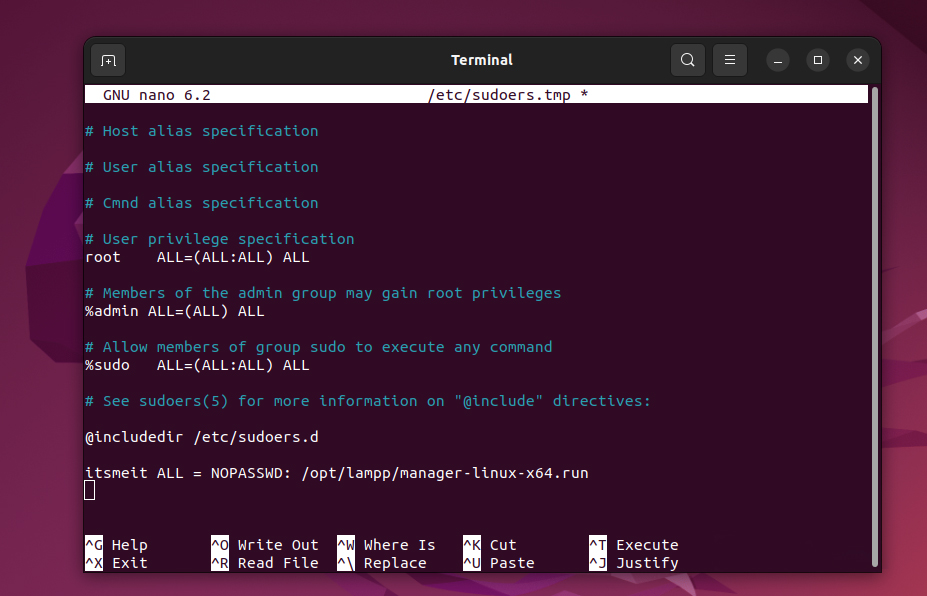
Go ahead, give sudo permission to the “xampp.desktop” shortcut to run on the desktop to open xampp on Ubuntu. To do this run the command “sudo visudo” and add the code “your-user ALL = NOPASSWD: /opt/lampp/manager-linux-x64.run” to the end of the file.
sudo visudo
your-user ALL = NOPASSWD: /opt/lampp/manager-linux-x64.run
Where “ your-user ” is your Ubuntu login account, my example is itsmeit, so I will enter itsmeit like screenshot:
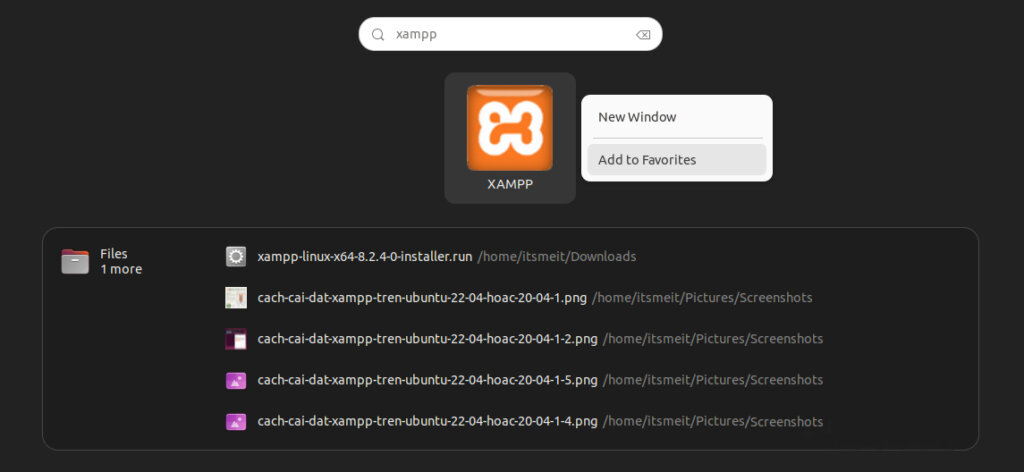
Okay, now you can find “Xampp” in the application list (Menu) and click “Add to Favorites” to add Xampp to the taskbar. From now on you can click on the Xampp icon and open xampp on Ubuntu without having to run a command every time you want to start or shut down/pause.
Recommendations:
- If you are a beginner, start with XAMPP to simplify the installation and usage process.
- When you become more familiar with system administration and web development, you can switch to using Nginx and PHP + MySQL for better performance and security.
If you want to completely remove the XAMPP server from your system, see the command you can use. But first, stop MySQL and Apache on XAMPP.
sudo /opt/lampp/./uninstall
sudo rm /usr/share/applications/xampp.desktop
By following this guide, you’ve set up a robust local development environment using XAMPP on Ubuntu. Start building amazing web applications today!


