Want to enjoy 15 years of free SSL protection while enhancing your website’s performance and security? We’ve already covered installing WordPress on aaPanel, and now we’ll take you through the steps to install Cloudflare SSL on aaPanel. Cloudflare’s comprehensive platform offers benefits like CDN, WAF, DDoS protection, and more, ensuring your website is both fast and secure.

Why Cloudflare SSL on aaPanel?
- Free 15-Year SSL: Protect your website with a free SSL certificate for 15 years.
- Enhanced Security: Cloudflare’s WAF and DDoS protection help shield your site from threats.
- Improved Performance: Cloudflare’s CDN speeds up your website’s loading times.
- Easy Integration: aaPanel makes it simple to install and manage your Cloudflare SSL.
Prerequisites:
- An aaPanel-hosted website using Nginx.
- A Cloudflare account.
Let’s get started!
Step 1: Log in to your Cloudflare account
Go to the Cloudflare website and log in to your account.
Step 2: Add the domain to Cloudflare
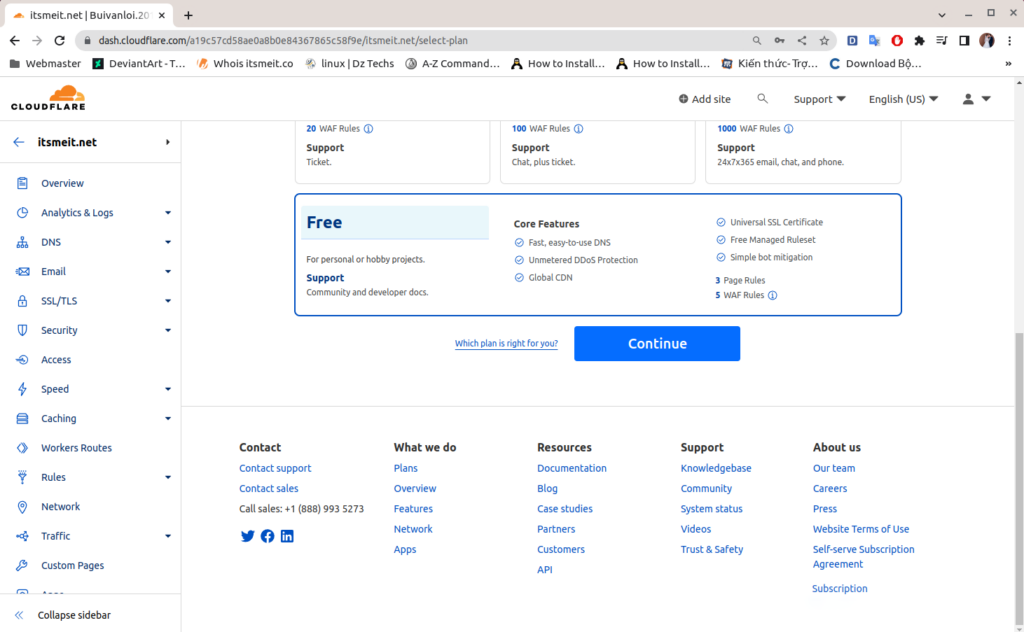
After logging in, add your domain name to Cloudflare by entering it in the “Add a website” box on the home page or by selecting “Add site” from the main menu and choose the “Free” plan.
Since this guide focuses on the free 15-year SSL certificate, select the “Free” plan and click “Continue.”
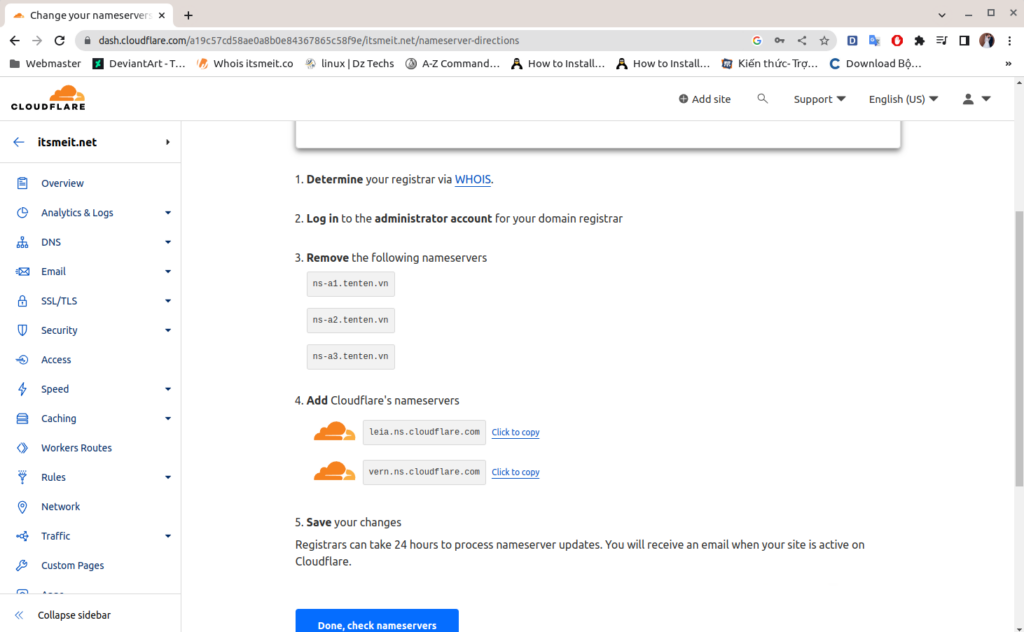
Cloudflare will then guide you through the process of updating your domain’s nameservers (NS) to point to Cloudflare’s DNS. Wait for Cloudflare to confirm the changes before proceeding.
Step 3: Select the “Full” SSL/TLS encryption mode
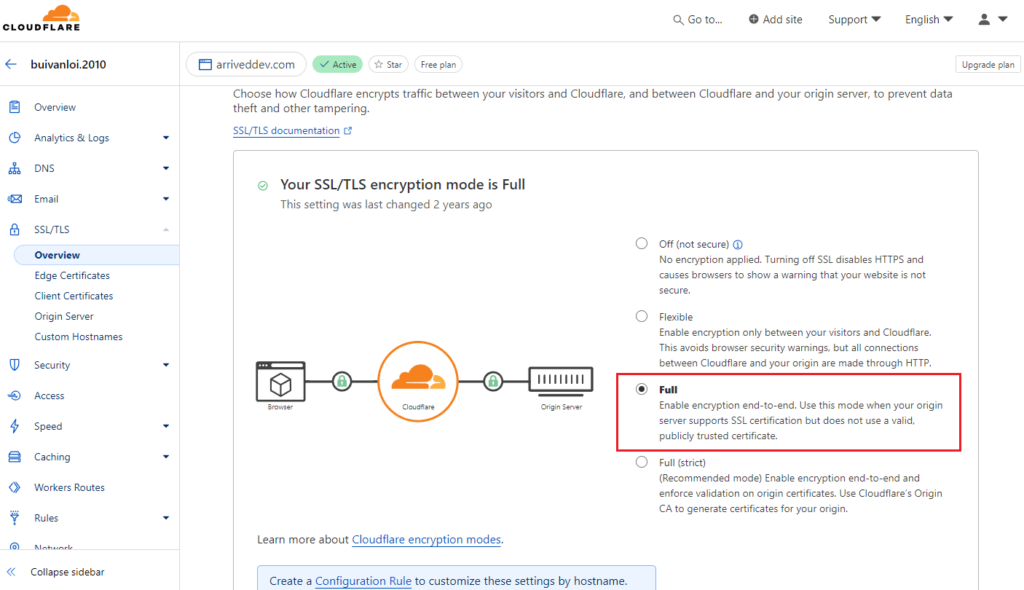
After your website has been successfully verified and activated on Cloudflare, go to the “SSL/TLS” page in the Cloudflare dashboard. Cloudflare offers options like “Flexible SSL”, “Full SSL”, and “Full (Strict) SSL”. These options provide different levels of security for the SSL connection.
For this guide, choose “Full” in the “Overview” tab as your SSL/TLS encryption mode. This ensures a secure connection between Cloudflare and your website’s server, encrypting traffic for enhanced security without requiring an SSL certificate on your origin server.
Step 4: Create a Cloudflare Origin Certificate
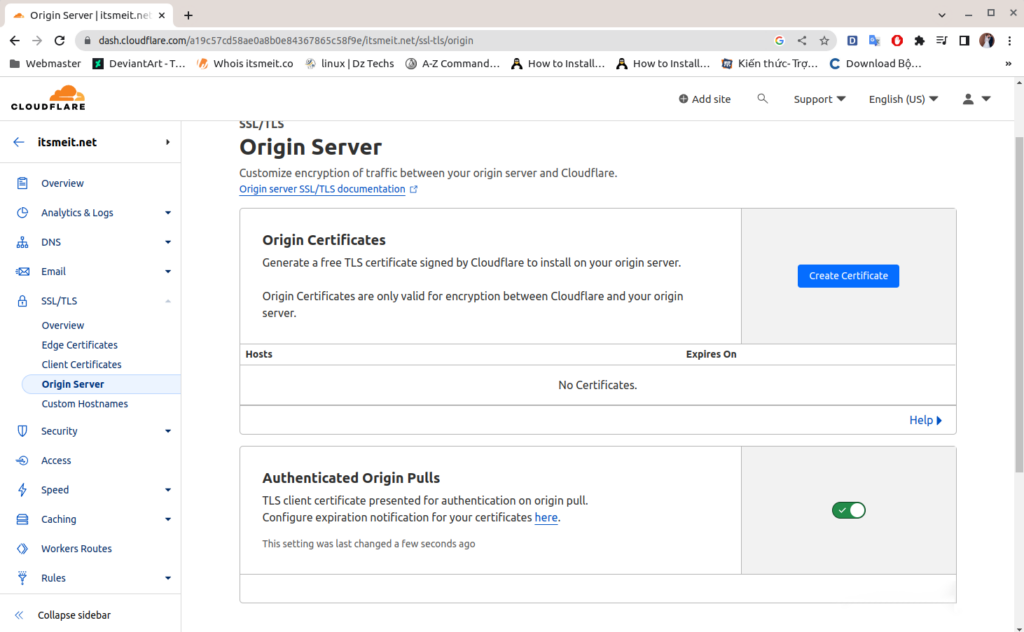
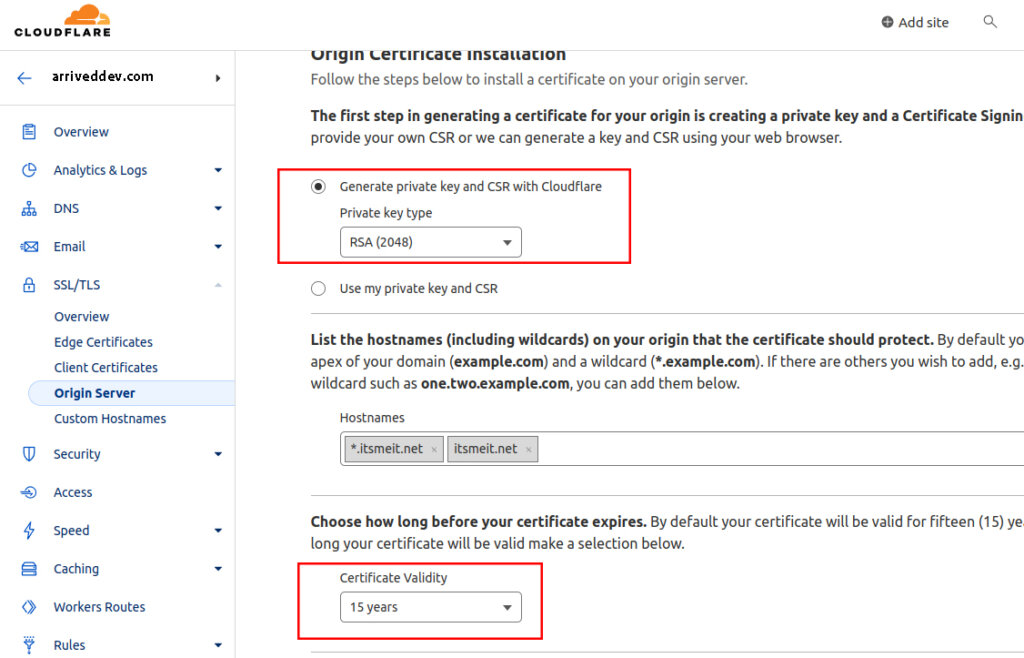
Click on “Origin Server” and then click on “Create Certificate” to create SSL.
In the dialog box, leave the settings as default (RSA (2048) for the certificate authority and ECDSA for the private key type). Make sure to check the “Certificate Validity” box and select a validity period of 15 years, then click on “Create” to generate the SSL certificate.
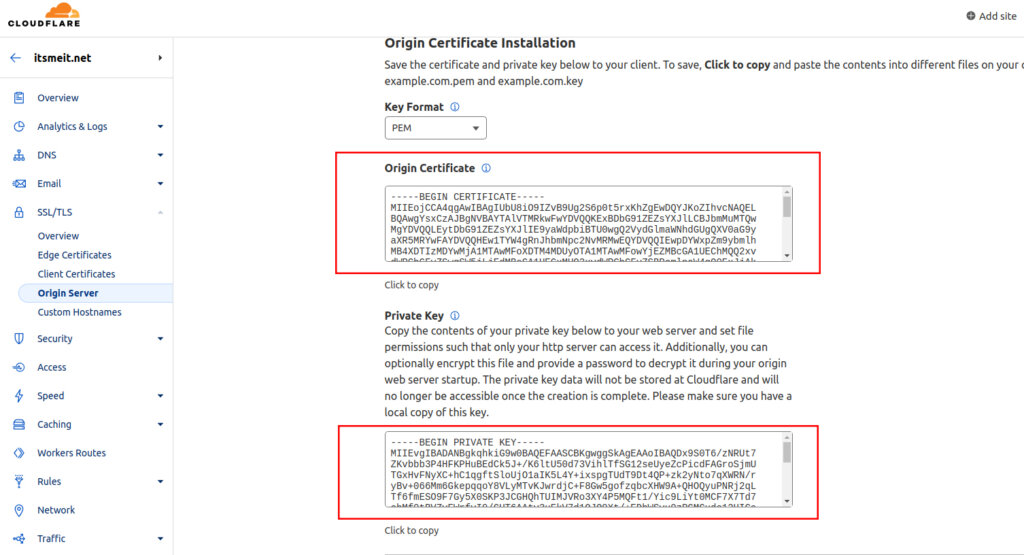
Copy and save the content within the “Origin Certificate” and “Private Key” boxes, as shown in the screenshot below. These values will be in PEM format, which is compatible with aaPanel.
Step 5: Configure Cloudflare Settings (Recommended)
To further enhance your website’s security and performance, consider enabling these Cloudflare settings:
- Overview: Enable SSL/TLS Recommender
- Edge Certificates: Enable Always Use HTTPS, Opportunistic Encryption, TLS 1.3, and Automatic HTTPS Rewrites
- Origin Server: Enable Authenticated Origin Pulls
You can find these settings within the SSL/TLS section of your domain’s Cloudflare dashboard.
Step 6: Install the SSL Certificate on aaPanel
With the “Origin Certificate” and “Private Key” copied from Cloudflare, open your aaPanel dashboard.
- Click on “Website,” select the domain you added to Cloudflare, and click on “SSL”.
- Go to the “Other certificate” tab and paste the “Origin Certificate” and “Private Key” into their respective fields.
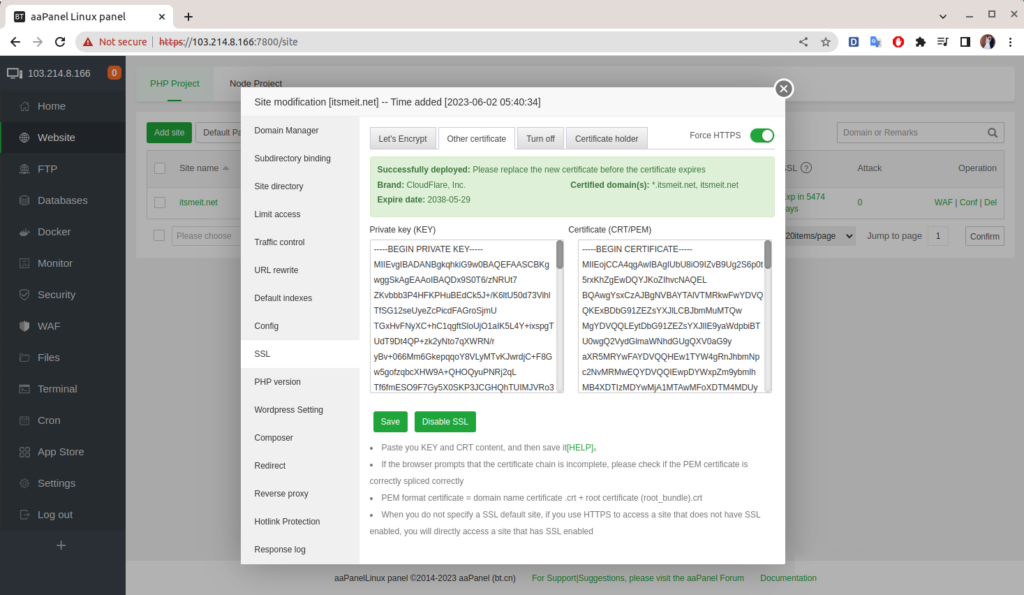
- Click “Save” to save the SSL on aaPanel and also enable “Force HTTPS”.
- Go to the aaPanel dashboard home page and click the “Restart” button to ensure the SSL changes take effect. (You can also simply restart Nginx).
Finally, clear your browser cache and Cloudflare cache (if enabled). Your website is now protected with a free 15-year Cloudflare SSL certificate and CDN.


