Running a self-hosted WordPress website on Ubuntu 22.04/24.04 ? This guide covers installing WordPress with the Apache 2 web server. We’ll go through setting up Apache, MySQL, PHP, and configuring WordPress for your Ubuntu environment step-by-step. By the end, you’ll have WordPress up and running to build your website or blog.

WordPress Installation with Apache 2 on Ubuntu 22.04/24.04 LTS
Step 1. Install PHP and MySQL
Before installing WordPress on Ubuntu with Apache, make sure your computer meets the following requirements:
- PHP: WordPress requires PHP to operate, so you need to install PHP.
- MySQL: You need to install the MySQL database to store WordPress data.
Step 2. Install Apache 2
On Ubuntu, there is usually Apache 2 available, but if you don’t have it, you can install Apache as instructed below. First, check if Apache 2 is installed on the system or not.
apache2 -version

Check apache 2 operational status.
sudo service apache2 status
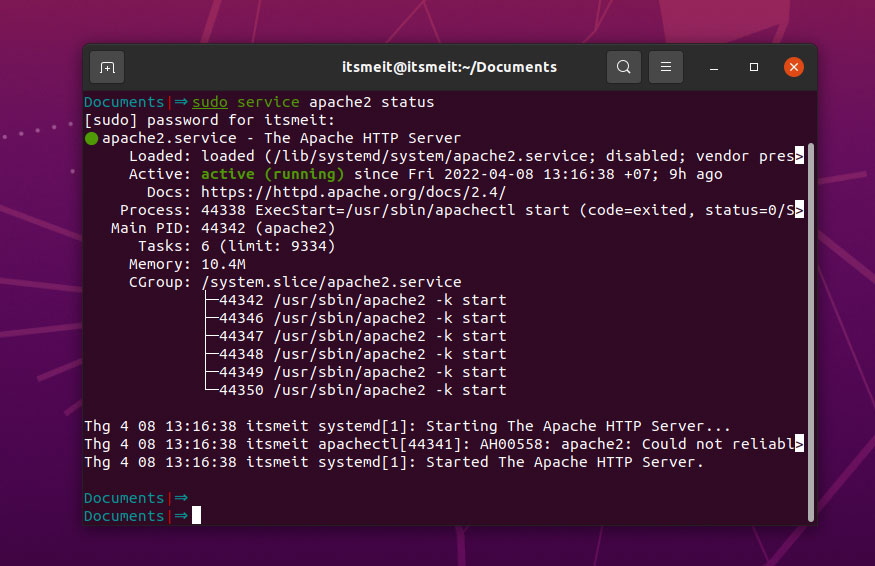
If Apache 2 does not exist on your system, you can run the command below to install it.
sudo apt update
sudo apt install apache2
After installing Apache, the command below can be used to stop, start and enable Apache to always start with the system.
sudo systemctl stop apache2.service
sudo systemctl start apache2.service
sudo systemctl enable apache2.service
Open your web browser and enter either “localhost” or “127.0.0.1” into the address bar. If the display appears as shown in the image below, it indicates that Apache has been successfully installed. Now you can start with installing WordPress on Ubuntu 22.04, 20.04, or Debian. Please continue to follow us for the next steps.

Step 3. Download the WordPress source code
At this step, you need to create a directory to store the source and download the WordPress zip file. We will do it as follows:
cd /tmp
wget https://wordpress.org/latest.tar.gz
tar -xvzf latest.tar.gz
sudo mkdir -p /var/www/vhosts/arriveddev.com/httpdocs
cd wordpress && sudo mv * /var/www/vhosts/arriveddev.com/httpdocs
sudo chown -R $USER:www-data /var/www/vhosts/
Using the commands above, We utilized the terminal to navigate to the /tmp directory, which is a temporary directory. Next, We created a directory at the path “/var/www/vhosts/arriveddev.com/httpdocs” and unzipped the file, before moving the source to the httpdocs folder.
Note:
The name of the directory can be set as desired (it is recommended to name it according to the project). The directory path will be configured in Apache in the next steps. Finally, We has granted permission to the directory at /vhosts.

To learn more about directory and file permissions in Linux when installing WordPress on Ubuntu 22.04, 20.04 or Debian, check out our guide on Configuring PHP 8 FPM on Ubuntu/Debian.
Step 4. Apache web server configuration file for WordPress
Create a new configuration file “arriveddev.com.conf” in the /etc/apache2/sites-available/ directory for your website by running the command, naming the file with your domain name, and pasting the content below. (replace arriveddev.com with your actual domain name)
sudo nano /etc/apache2/sites-available/arriveddev.com.conf
Edit the domain name (ServerName, ServerAlias) and the path to the directory where your website’s files are stored (DocumentRoot), and press Ctrl + X to select Y to save the file. After saving the above config file, run the commands below to activate and restart apache2.
sudo a2ensite arriveddev.com.conf
sudo systemctl restart apache2.service
When starting apache2, if any error messages are displayed, run the command below to check and fix the configuration.
sudo apachectl configtest
Continue to run the command to set permission for the directory
sudo chown -R $USER:www-data /var/www/vhosts
Step 5. Config hosts domain localhost for WordPress
If installing WordPress on a Ubuntu localhost, you need to set up 127.0.0.1 for the domain. Open the “hosts” file and add the following:
sudo nano /etc/hosts
With the hosts the configuration above, when you run the domain arriveddev.com on your browser, it will point to the IP localhost 127.0.0.1 like a real domain without having to run localhost/project.
For the server or hosting, skip this step and have to transfer the domain pointing to the IP of the provider. Please contact the provider.
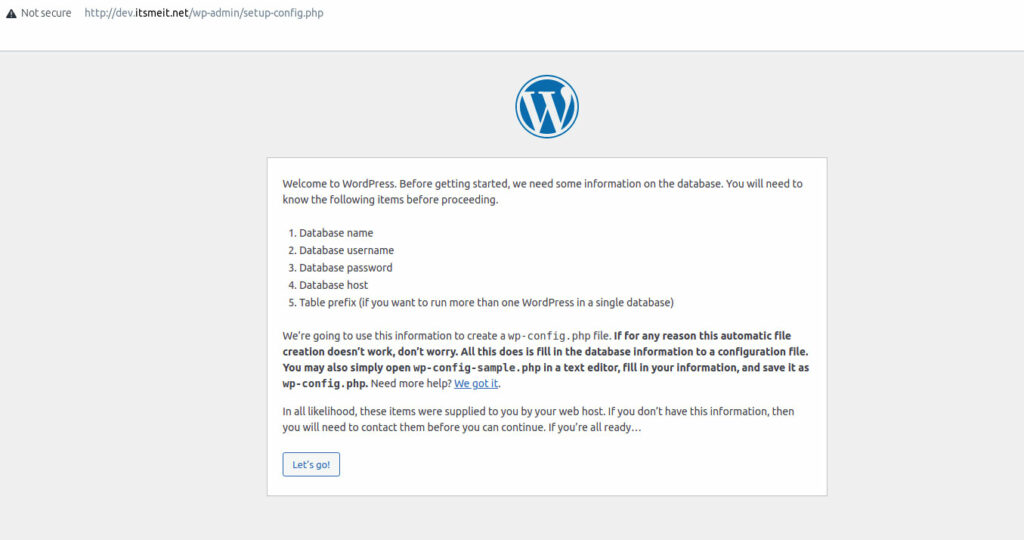
Now, open your web browser and enter the URL “arriveddev.com.” If the result displayed is successful, proceed to the next step, which is installing and setting up the website.
Step 6. Create user and database
To establish a connection with the database and start configuring the website, it’s necessary to create a database. In this case, a database will be created and used with a MySQL user granted with sufficient privileges, instead of the root user.
Login to MySQL
sudo mysql (or) sudo mysql -u root -p
The following commands will create a MySQL database and user that you can use to install WordPress with Apache2 on Ubuntu. Remember to change the “user” and “database” to your own information.
CREATE DATABASE dev_itsmeit;
CREATE USER 'dev_itsmeit'@'localhost' IDENTIFIED BY 'Password123#';
GRANT ALL PRIVILEGES ON dev_itsmeit.* TO dev_itsmeit@localhost IDENTIFIED BY 'Password123#';
FLUSH PRIVILEGES;
Step 7. Connect database
Open the browser running the domain that you configured in the steps above, click Let's go!, and start setting up.
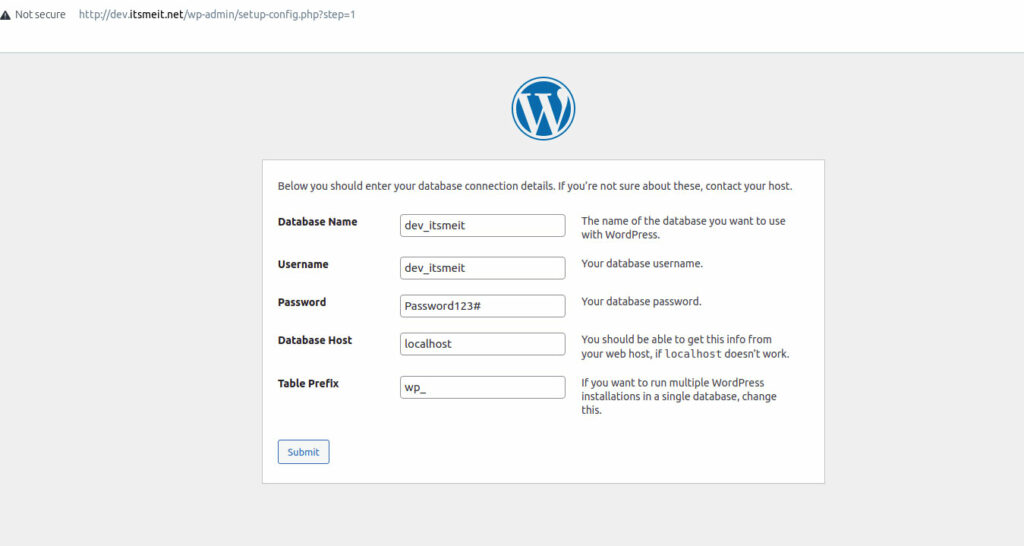
Enter the database, user, and password information that you created in step 5 and configure it as shown in the image above, then click the “submit” button.
Continue, press “Ctrl + A” in the frame as shown below, and copy the all content.
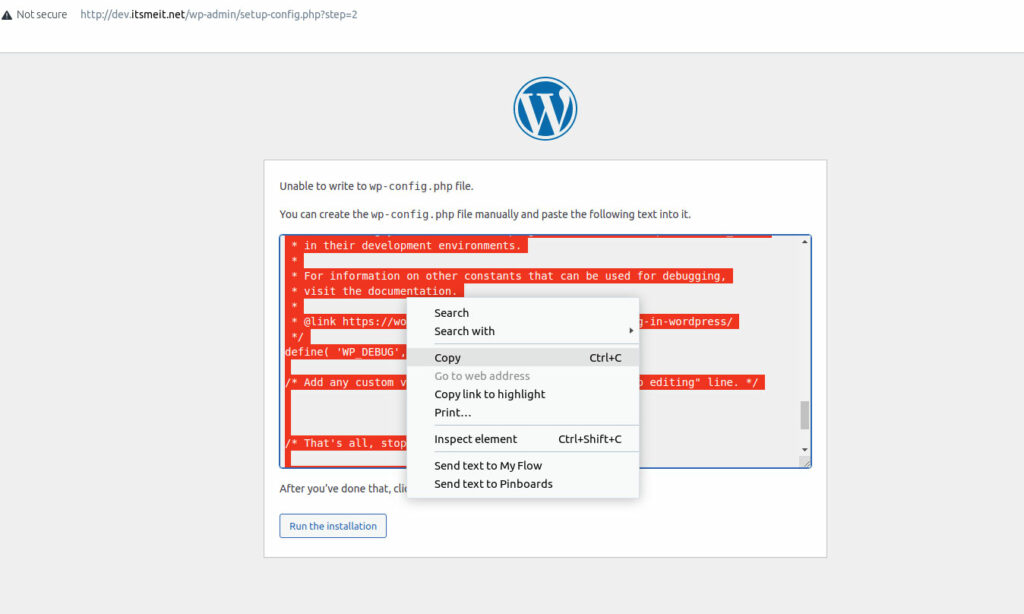
Next, run the command to create wp-config.php the file and paste the copied content here. (The path to your wp-config.php file).
nano /var/www/vhosts/arriveddev.com/httpdocs/wp-config.php
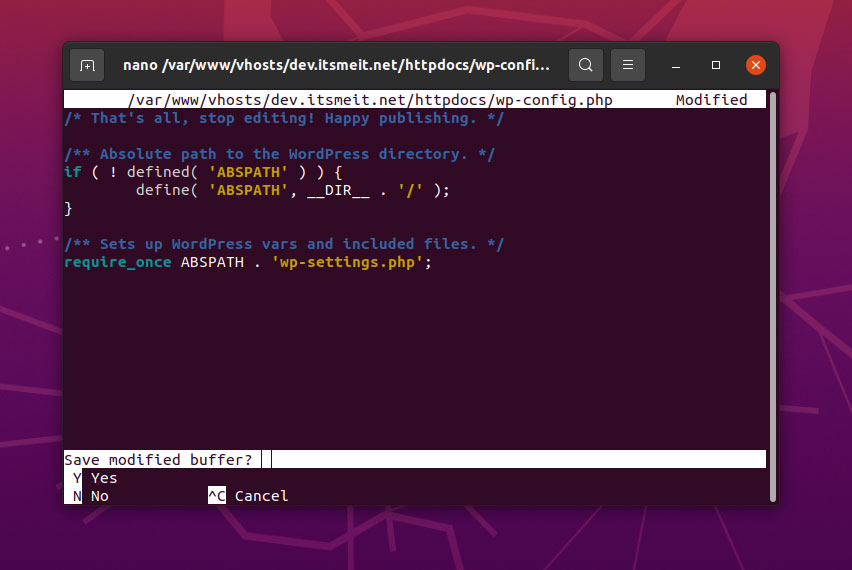
Press “Ctrl + X” and select “Y” to save the changes. Then return to your web browser and click on “Run the Installation” to continue the install WordPress on Ubuntu 22.04, 20.04.
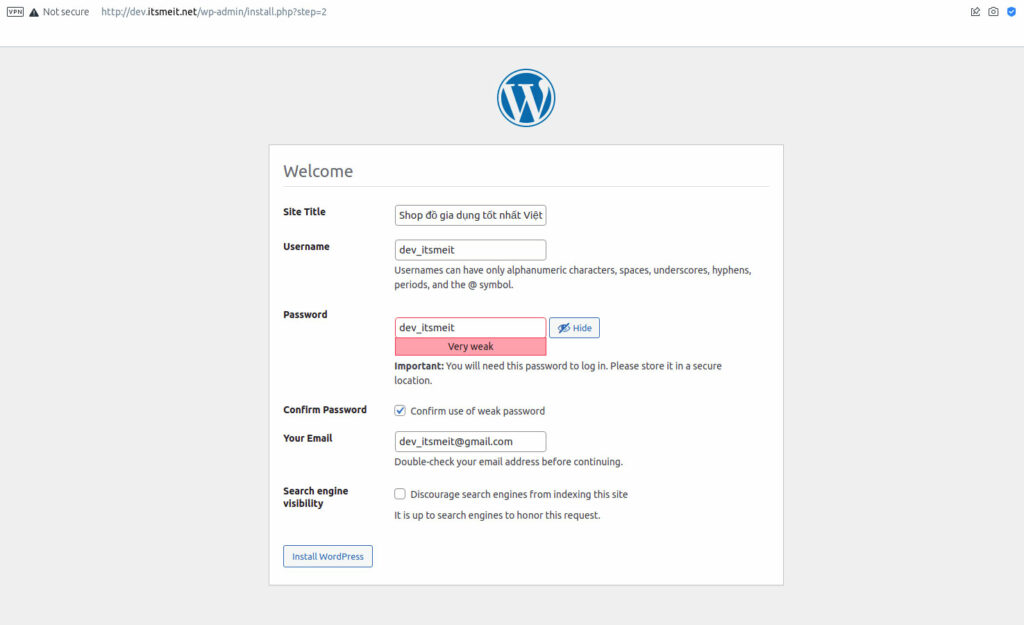
Done! You can now log in to the admin area using the account you created and start building your website. WordPress offers numerous themes and plugins to enhance your site’s functionality and appearance.
Those are the steps to install WordPress with Apache 2 on Ubuntu 22.04, 20.04, or Debian. You can also consider setting up SSL to use “https” on your localhost. Hopefully, this guide has been helpful!
In case you encounter 404 errors with your URLs after installation, you can refer to the article [Fix 404 Errors] for guidance.


