When developing web applications, testing and ensuring HTTPS security on the localhost environment is an important step. Although localhost is not an actual server, we can use a technique called “self-signed SSL certificate creation” to simulate the HTTPS environment on your local machine. In this guide, we will learn how to create and configure a self-signed SSL certificate for localhost on Ubuntu 22.04/24.04 LTS, helping you to test and verify HTTPS-related features during development.

Generate SSL certificate and configure hosts file
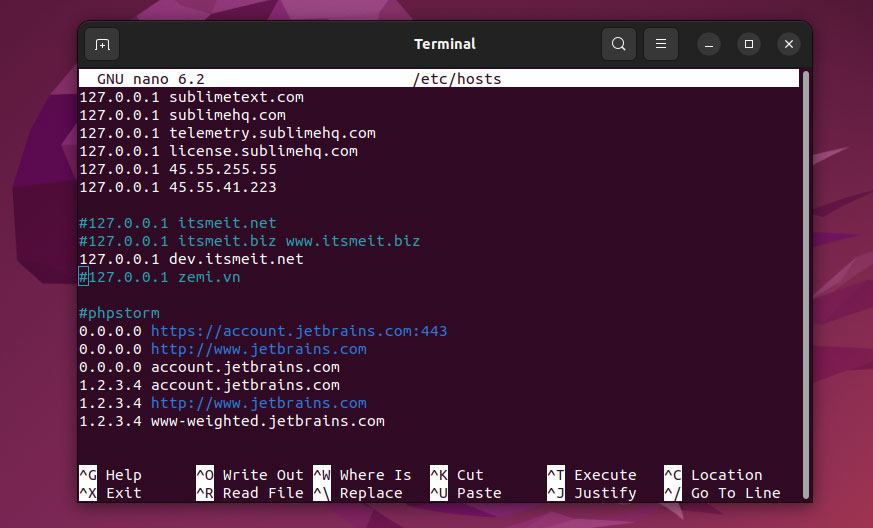
To enable HTTPS (secure connection) on your local development environment (localhost), you’ll need to generate a self-signed SSL certificate and configure your hosts file. The hosts file allows you to map a custom domain name to your local IP address (127.0.0.1), which is necessary for SSL certificates to work correctly. In this step, we’ll create a domain called “arriveddev.com” and associate it with our local IP address.
sudo nano /etc/hosts

When you assign the domain arriveddev.com to the localhost ip 127.0.0.1 then you will run the website directly with the domain arriveddev.com instead of http://localhost/project or http://127.0.0.1/project.
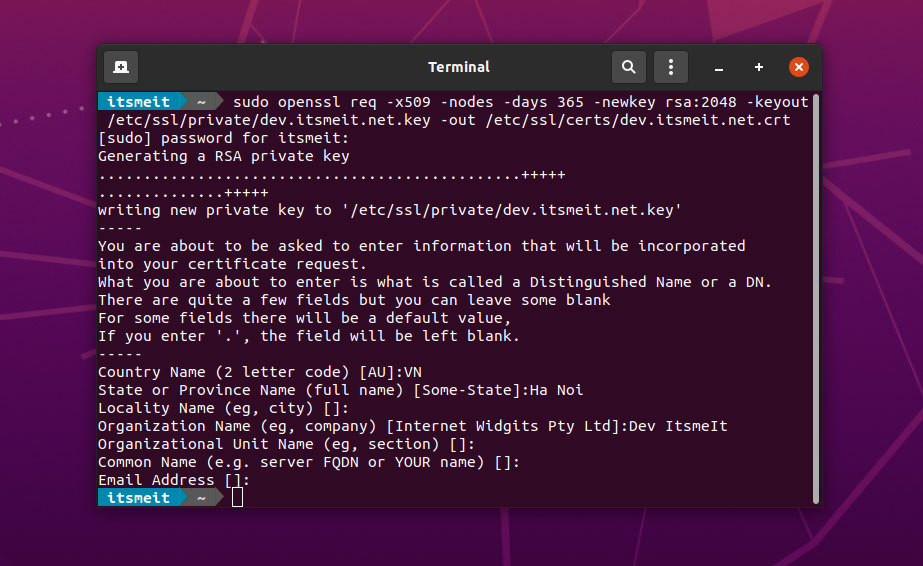
Next, run the following command on the terminal to generate 2 ssl certificate files with the endings “.key” and “.crt“, remember to change arriveddev.com to your domain name.
sudo openssl req -x509 -nodes -days 365 -newkey rsa:2048 -keyout /etc/ssl/private/ arriveddev.com.key -out /etc/ssl/certs/ arriveddev.com.crt

Configure SSL localhost for Apache2
To run your domain with HTTPS (SSL), you need to add port 443 in your Apache domain configuration file. For example, the Apache configuration file for the WordPress domain is /etc/apache2/sites-available/arriveddev.com.conf.
<VirtualHost *:80>
  ServerName  arriveddev.com
  ServerAlias www.arriveddev.com
  Redirect permanent / https://arriveddev.com/
</VirtualHost>

<VirtualHost *:443>
  ServerName  arriveddev.com
  ServerAlias www. arriveddev.com
  DocumentRoot /var/www/vhosts/arriveddev.com/httpdocs
  Protocols h2 http:/1.1
  <If "%{HTTP_HOST} == 'www.arriveddev.com'">
    Redirect permanent / https://arriveddev.com/
  </If>

  ErrorLog ${APACHE_LOG_DIR}/arriveddev.com-error.log
  CustomLog ${APACHE_LOG_DIR}/arriveddev.com-access.log combined
  SSLEngine On
  SSLCertificateFile /etc/ssl/certs/arriveddev.com.crt
  SSLCertificateKeyFile /etc/ssl/private/arriveddev.com.key

  SSLCipherSuite ECDHE-ECDSA-AES128-GCM-SHA256:ECDHE-RSA-AES128-GCM-SHA256:ECDHE-ECDSA-AES256-GCM-SHA384:ECDHE-RSA-AES256-GCM-SHA384:ECDHE-ECDSA-CHACHA20-POLY1305:ECDHE-RSA-CHACHA20-POLY1305:DHE-RSA-AES128-GCM-SHA256:DHE-RSA-AES256-GCM-SHA384
  SSLProtocol All -TLSv1.2 -TLSv1.3
  SSLCompression off
  #SSLUseStapling on
  Header always set Strict-Transport-Security "max-age=63072000"
  <Directory /var/www/vhosts/arriveddev.com/httpdocs/>
       Options FollowSymlinks
       AllowOverride All
       Require all granted
  </Directory>
</VirtualHost>Note: Edit the domain name, path to the source code, and SSL path, then save the file. After that, to get the configuration working, you need to enable the Apache2 SSL module.
sudo a2enmod ssl
After setting up SSL on localhost Ubuntu 22.04/24.04, the next step is configuring the Global ServerName.
Open the apache2.conf file and add ServerName 127.0.0.1 to the end of the file.
sudo nano /etc/apache2/apache2.conf
. . .
# Include the virtual host configurations:
IncludeOptional sites-enabled/*.conf

# vim: syntax=apache ts=4 sw=4 sts=4 sr noet
ServerName 127.0.0.1
Finally, check the configuration file syntax again, if OK then restart apache2 is okay. If there is an error message, run the command sudo apachectl configtest to determine the error.
sudo service apache2 restart
Configure SSL localhost for Nginx
Similar to Apache, after configuring /etc/hosts and creating an SSL localhost on Ubuntu with 2 files ending in “.key” and “.crt” in the previous step, now you only need to add the configuration for port 443 to run HTTPS on localhost using Nginx. Example configuration for WordPress file:
server {
    listen 80;
    listen [::]:80;
    listen 443 ssl http2;
    root /var/www/vhosts/arriveddev.com/httpdocs;
    index index/ index.htm;

    server_name  arriveddev.com www.arriveddev.com;

    access_log  /var/log/nginx/arriveddev.com.vhost.log;
    error_log   /var/log/nginx/arriveddev.com.vhost.err;

    ssl_certificate /etc/ssl/certs/arriveddev.com.crt;
    ssl_certificate_key /etc/ssl/private/arriveddev.com.key;

    ssl_ciphers "EECDH+AESGCM:EDH+AESGCM:ECDHE-RSA-AES256-GCM-SHA512:DHE-RSA-AES256-GCM-SHA512:ECDHE-RSA-AES256-GCM-SHA384:DHE-RSA-AES256-GCM-SHA384:ECDHE-RSA-AES256-SHA384";
    ssl_ecdh_curve secp384r1;
    ssl_session_cache shared:SSL:10m;
    ssl_session_timeout 10m;
    ssl_protocols TLSv1.2 TLSv1.3;
    ssl_prefer_server_ciphers on;
    resolver 8.8.8.8 8.8.4.4 valid=300s;
    resolver_timeout 5s;

    location / {
        try_files $uri $uri/ =404;
    }
}
Explain:
- root is the path to the directory running the website
- server_name is the website domain
- listen 80 is the default port (*:80) when installing Nginx
- listen 443 SSL http2 is the port configuration to run SSL (https)
- ssl_certificate and ssl_certificate_key are the key for the authentication file
Note: Edit the domain name, path to the source code, and SSL path, then save the file. After that, to get the configuration working, you need to restart nginx.
Now your domain will be served over HTTPS, but the SSL localhost is not authenticated. Therefore, you need to confirm it manually as shown below. Creating an SSL localhost on Ubuntu this way will also allow you to test or develop plugins that need to connect to APIs such as Facebook, Google, etc.

In conclusion, these two methods demonstrate how to create an SSL localhost Ubuntu 22.04/24.04 using Nginx or Apache. This technique will help you transition from HTTP to HTTPS, just like on a live production server.


