Are you encountering the dreaded “Permission Denied” error when working with PHP8-FPM on your Ubuntu Linux system? Don’t worry, you’re not alone! This common issue often trips up developers and system administrators alike. In this guide, we’ll walk you through the steps to troubleshoot and resolve this error, ensuring your PHP applications run smoothly.
Understanding the Impact of “Permission Denied”
The “Permission Denied” error can manifest in various ways, hindering your workflow:
- File Uploads: You might be unable to upload files to your server.
- File Modification: Editing existing files could become impossible.
- Code Execution: PHP scripts might fail to run or render correctly.
- Deployment Issues: Deploying your code or accessing cached data may be blocked.
Important Note: While the chmod 777 command might seem like a quick fix, it’s crucial to avoid it due to the significant security risks it poses. The correct approach involves properly configuring file permissions.
Setting File Ownership (USER) to Fix Permission Denied
After successfully installing your desired PHP version on your Ubuntu system, you’ll need to adjust the configuration to resolve the “Permission Denied” error. Here’s how:
Before doing this, you can make a backup in case you want to go back to the default.
sudo cp -R /etc/php/8.0/fpm/pool.d/www.conf /etc/php/8.0/fpm/pool.d/www.conf.bak
sudo nano /etc/php/8.0/fpm/pool.d/www.conf
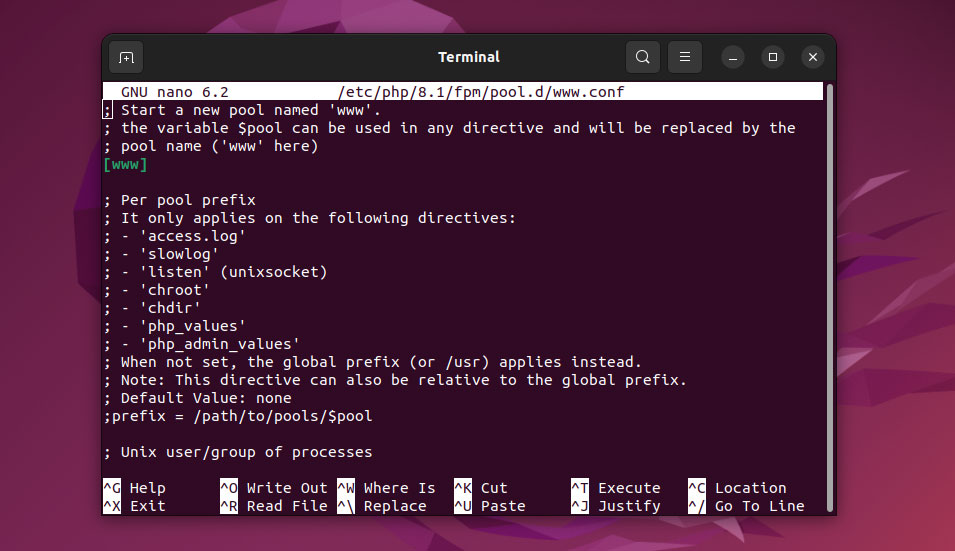
Within the www.conf file, locate the [www] section. This section defines the user and group settings that PHP-FPM processes will run under. By default, these are set to the www-data user and group.
On Ubuntu systems using Nginx or Apache, web projects are typically stored in the /var/www/ directory. The user and group settings in www.conf directly impact the permissions of files and folders within this directory.
- user = www-data
- group = www-data
By default, PHP-FPM runs under the www-data user and group. This means that files and directories created or modified by PHP-FPM will inherit these permissions. In some cases, this can lead to “Permission Denied” errors if your user account (or the account you’re using to interact with the web server) doesn’t have the necessary permissions to access or modify these files.
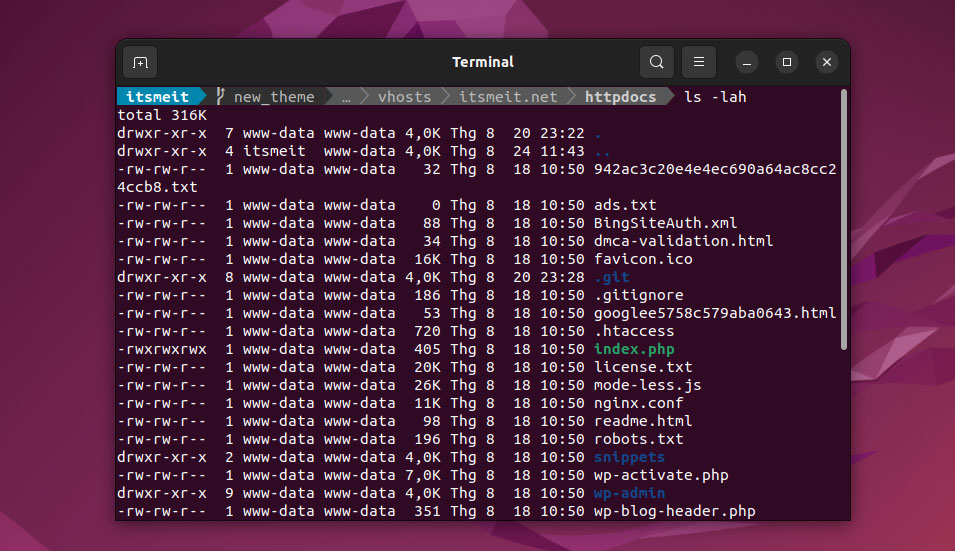
Therefore, the solution is to grant the appropriate user read, write, and execute permissions. In this guide, we’ll assign these permissions to the user “arriveddev” (replace “arriveddev” with your actual Ubuntu username).
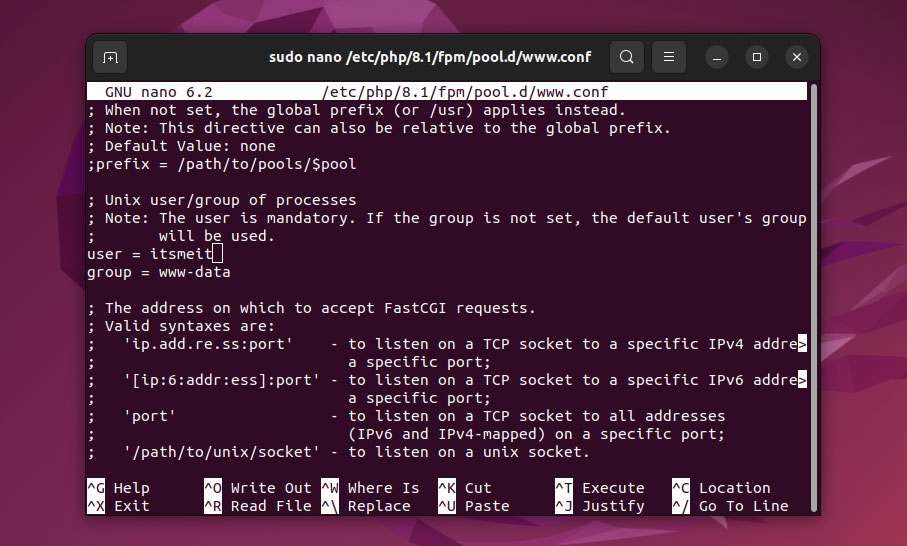
Then restart the php-fpm to make the changes effective.
sudo service php8.1-fpm restart
Final Step: Setting Project Directory Ownership
After granting the necessary permissions to your user (arriveddev), you’ll need to update the ownership of your project directories to match. This ensures that your user has full control over the files and folders within your projects.
Use the following command to recursively change the ownership of your project directory and its contents:
sudo chown -R arriveddev:www-data /var/www/your_project_directory
Important Considerations:
- Replace “
arriveddev” with your actual Linux username - Replace
"your_project_directory"with the actual path to your project’s root folder. - The
-Rflag (recursive) ensures that ownership is changed for all files and subdirectories within the project directory. - The
www-datagroup is typically used for web server processes, so keeping it as the group owner allows the web server to access and serve your project files.
While fixing the “Permission Denied” error is a crucial step, it’s just the beginning of your journey with PHP8-FPM on Ubuntu. As you continue to develop and deploy your applications, you’ll discover even more powerful features and configurations. Keep learning, experimenting, and optimizing your setup to ensure your PHP projects run seamlessly and securely.


